My 1939 Ford Standard Coupe - The Tear Down
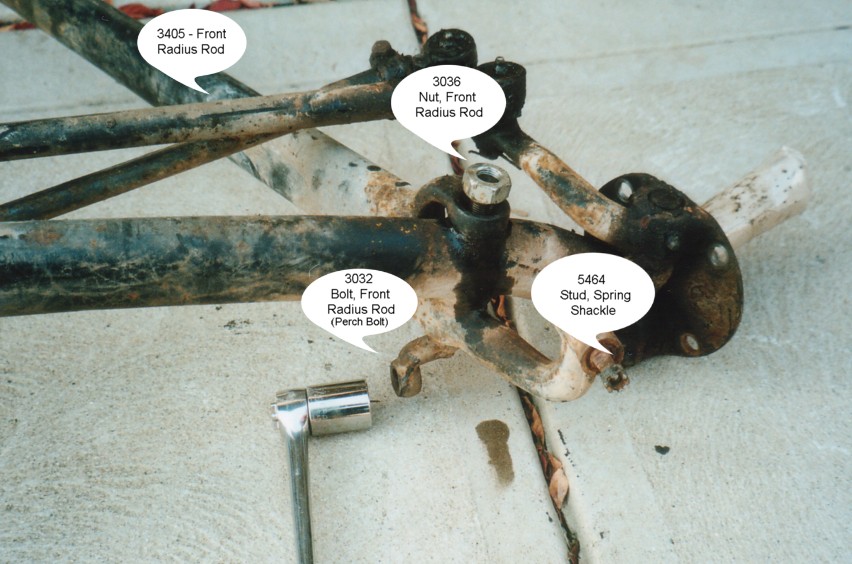
The following pictures show the
disassembly of the front axle and radius rods. This is another good look
at the tubular axle from the car. There are various difficulties in
removing some parts and care should be taken to preserve the parts (and of
course, to prevent injury always use eye protection when hammering on
things). I've intentionally left the first picture large to keep the
detail and I've noted the various parts by description and basic Ford
number.
You won't see the original nut for the radius rod bolt in this
picture.....I'd already removed it. I used a standard nut of the same
thread size to provide a safe impact point to hammer on. The original
unique nut is tapered on one side and castellated on the other and I
didn't want to damage it.
All the photos on this webpage show the axle and radius rods in an
upside-down position which made the disassembly easier. After these
particular jobs, I used my "fork" type tie-rod separator tool to
remove the various steering rods shown in the photos.
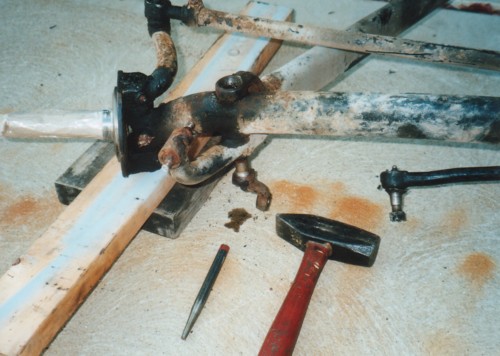
In this photo I have used the hammer to drive the bolt (also known as the "perch bolt") down. I soaked it with WD40 and used the replacement nut to hammer on. It took several sturdy blows but I was pleased at how easy it came out. I'm sure that if the whole assembly had been sitting outside for many years, the process would have been more difficult.
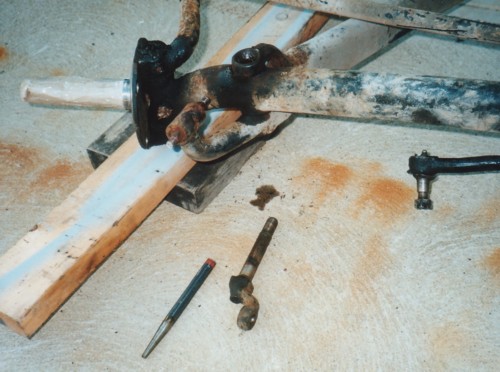
You can see that the bolt has dropped out here. The hammering on the nut only knocked the bolt down barely one quarter inch....enough to loosen it. The drift pin and hammer pushed it down and out the rest of the way. In these photos you can see the shackle stud still in the "perch bolt". They have to come out too, but I had to separate the radius rods from the axle to gain clearance to drive them out.